

Let’s get tuned up!
Every guitar sounds better properly tuned, let’s see how its done.
Quick Start Tuning Guide
Already experienced? Happy to tune by ear? Click on the buttons below to hear your tuning notes.
How to Tune Your Guitar
Every guitar needs regular tuning to sound its best. When you first buy your guitar it should come already tuned; however, guitars don’t stay in tune for very long. In fact, the general rule of thumb is that every time you pick up your guitar, you should tune it again.
The two most common methods of tuning are: using an electronic guitar tuner and tuning by ear. Both of these methods have their pros and cons, but for an absolute beginner your best chance of tuning your guitar yourself is with an electronic guitar tuner.
Guitar tuners come in all shapes and sizes, and with a range of different features. When you first start out you don’t really need an expensive tuner with lots of features. A simple tuner will do nicely and can be purchased from any music shop.
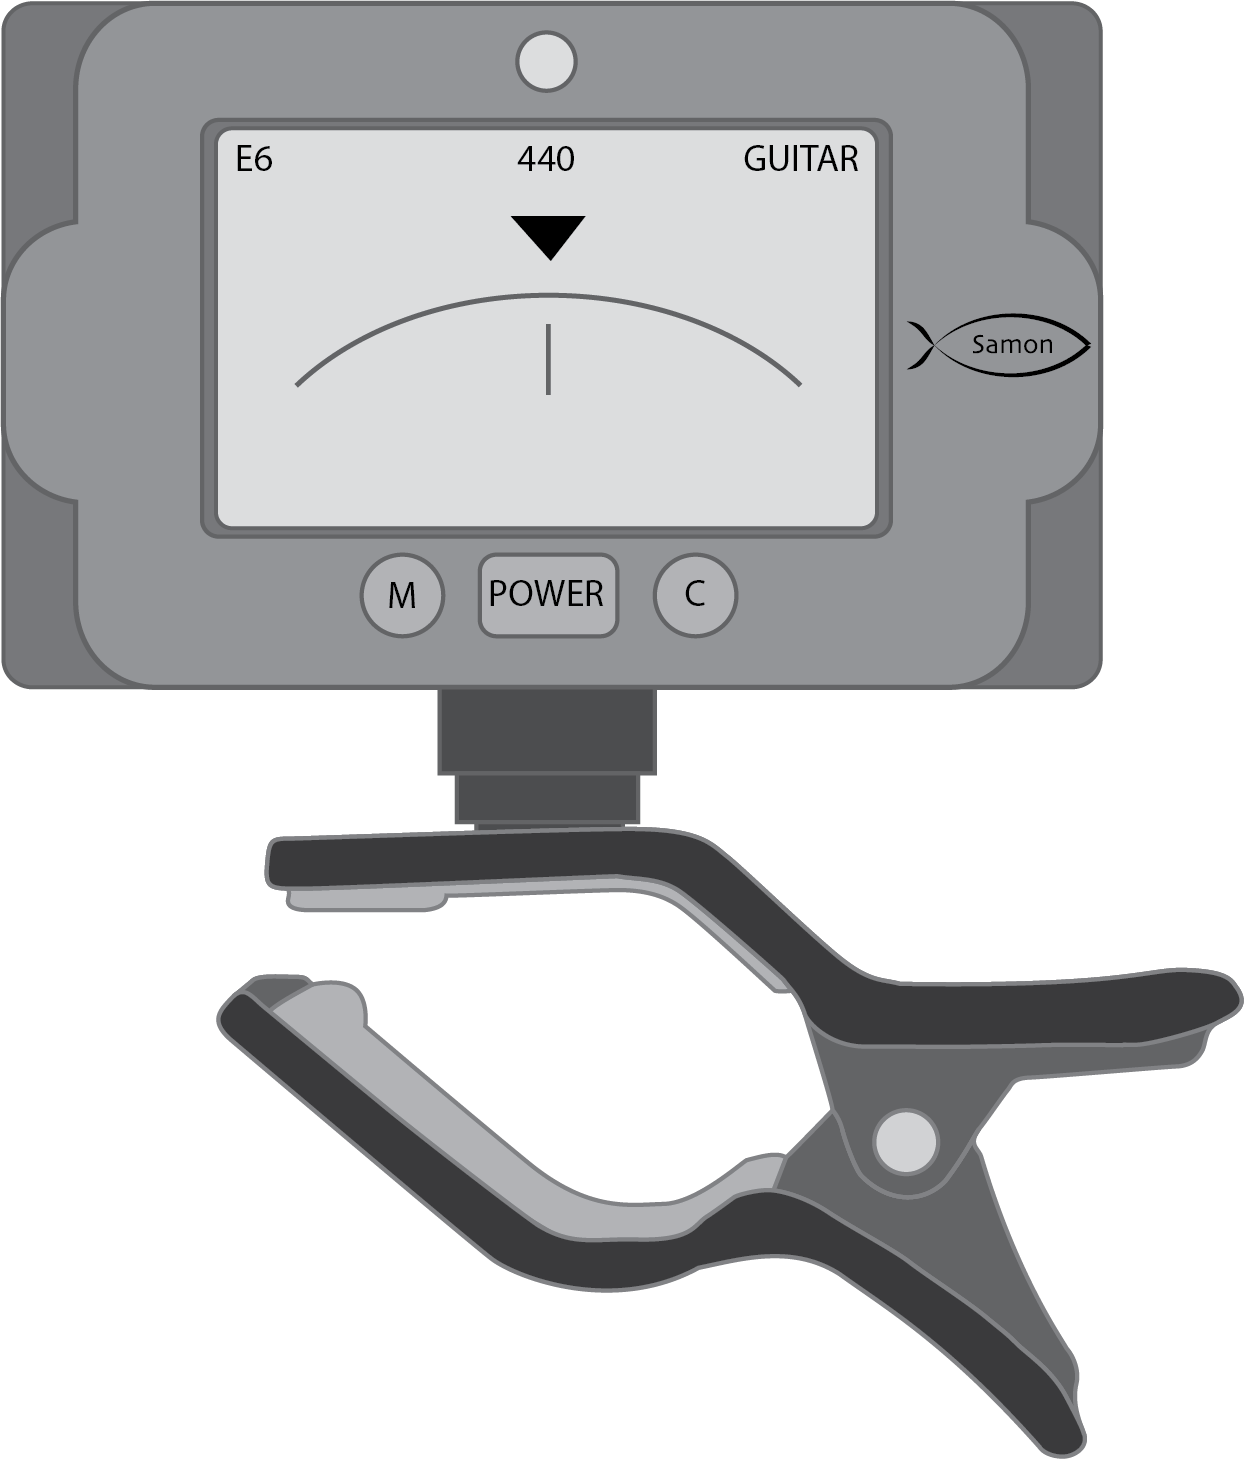
Clip on tuners are the most popular at the time of this publication as they can be conveniently left attached to the guitar, reducing the risk of losing them. Additionally they work by monitoring the vibrations from the instrument they are attached to instead of via a microphone. This makes them easier to use in a room with background noise or while other people may be talking.

Tuning Notes
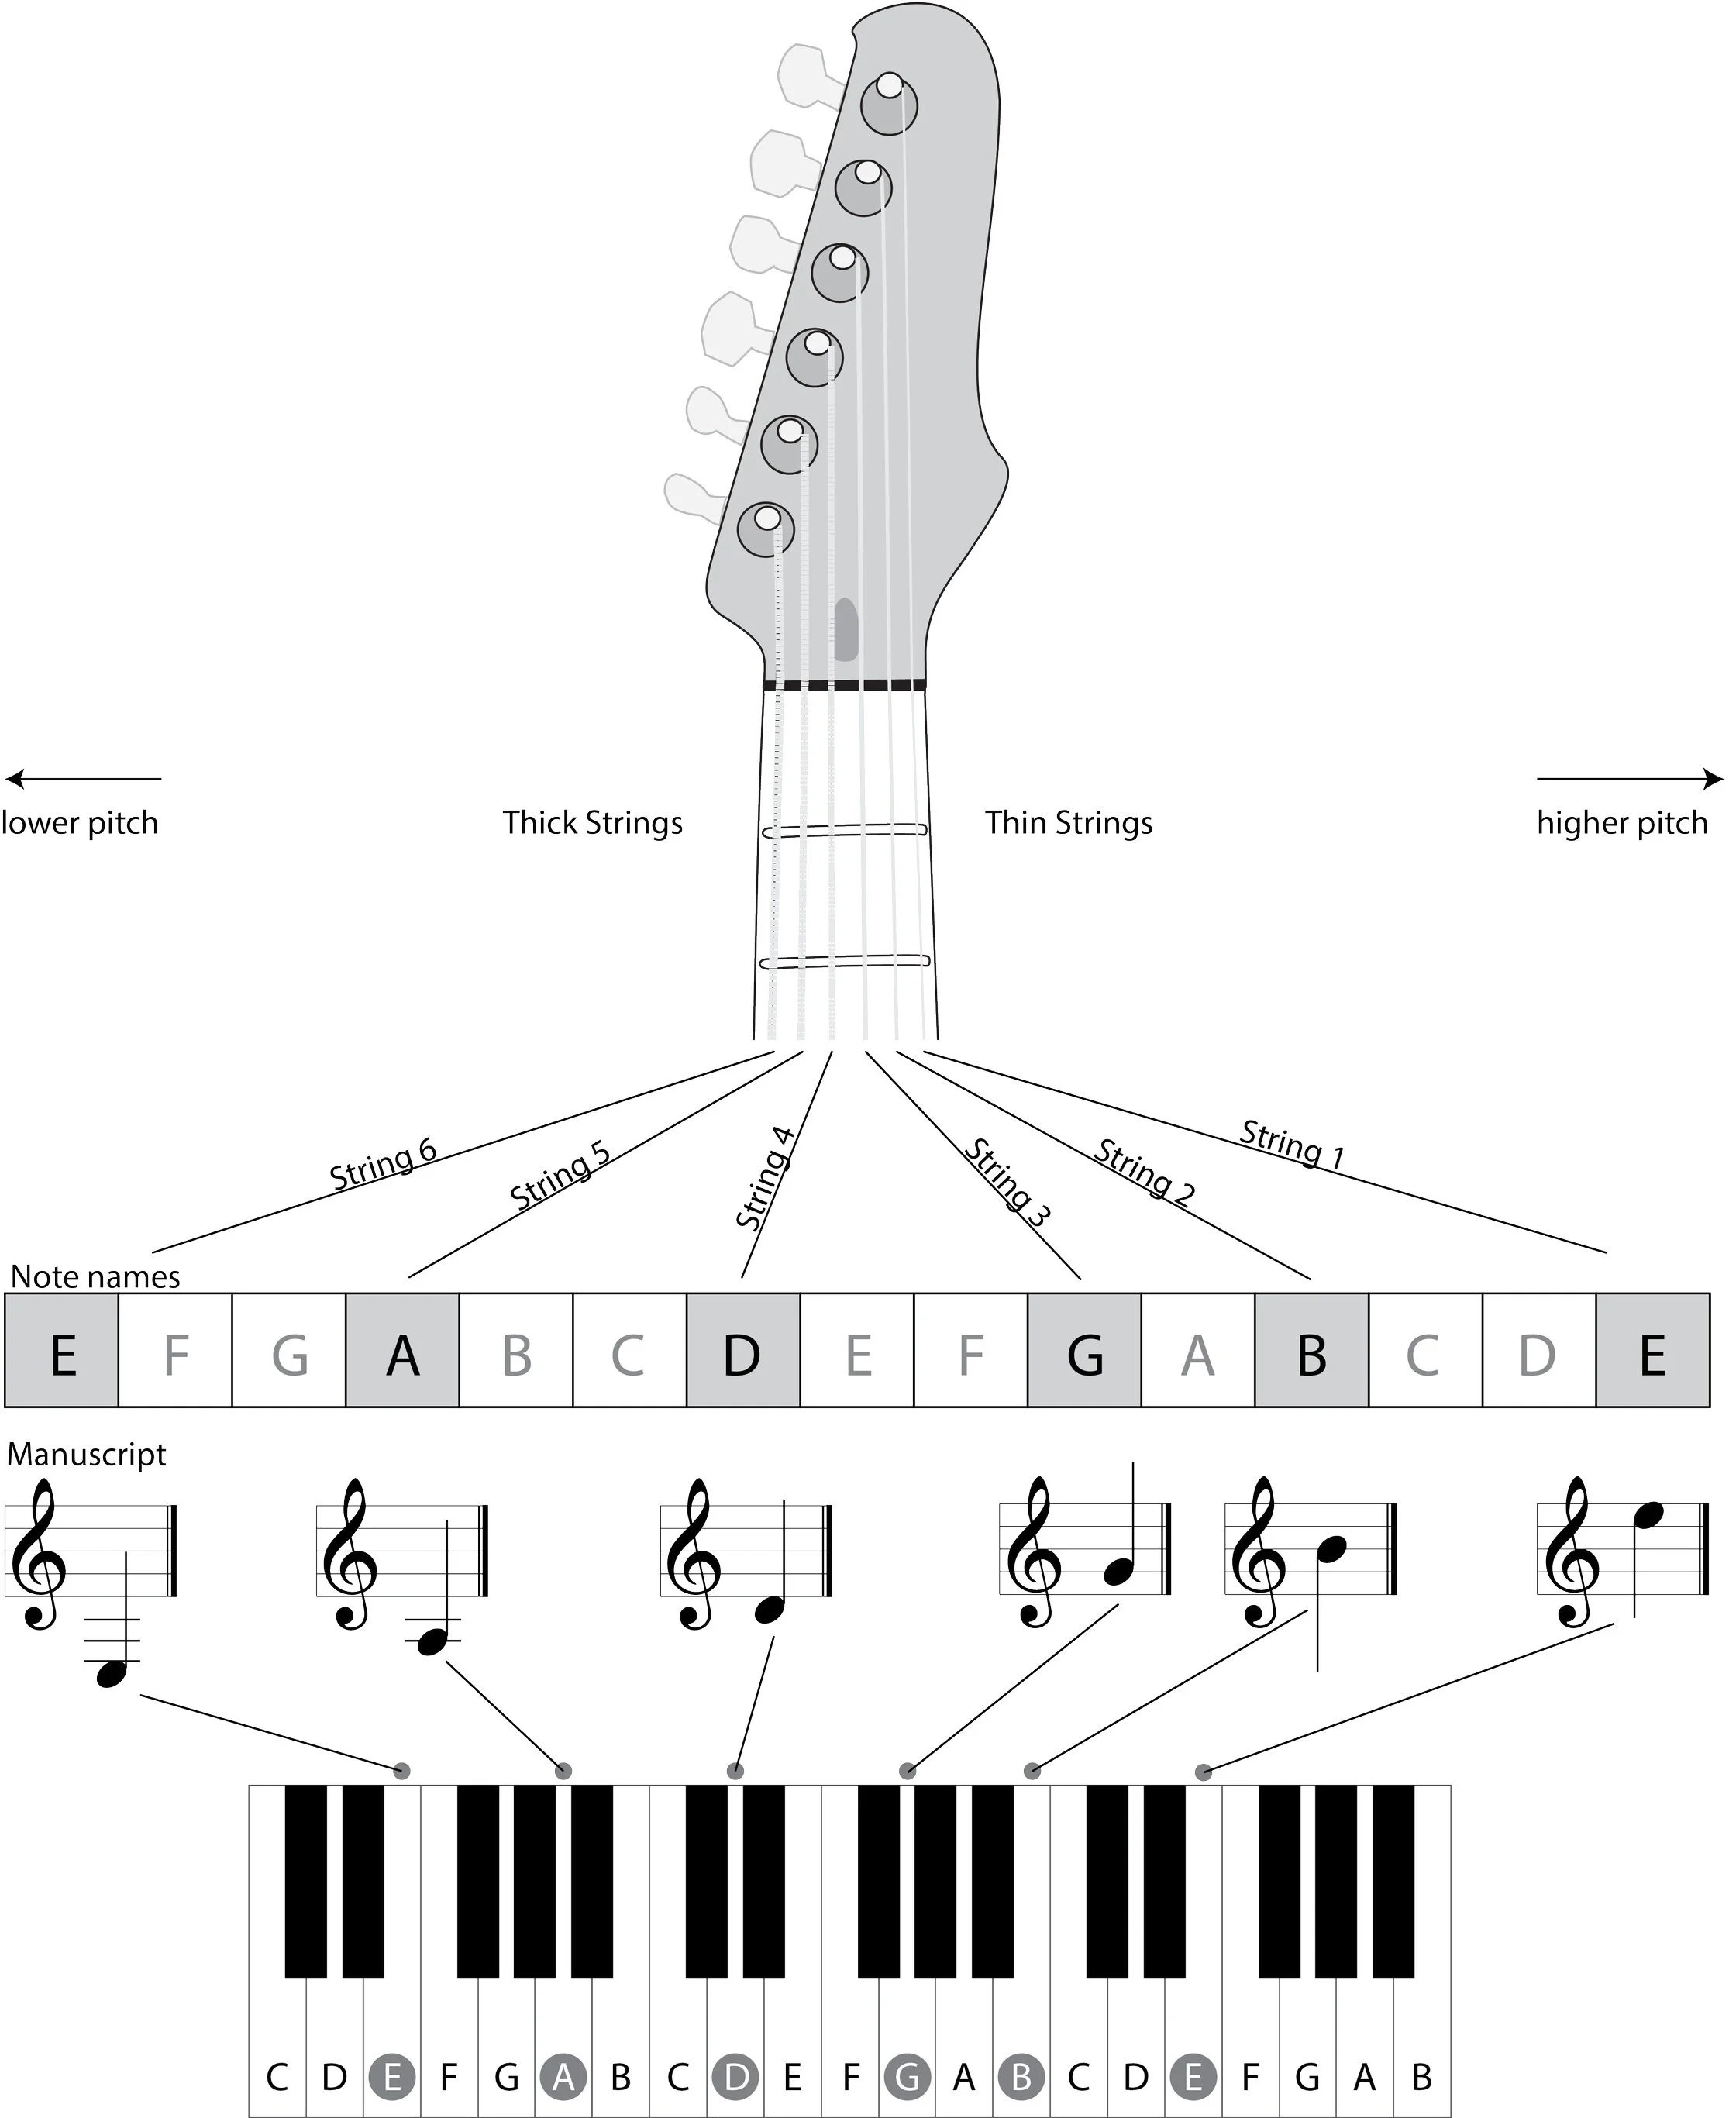
In order to tune your guitar you will need to know what notes each of your strings must be tuned to. In Figure (s), you can see a summary of the seven note names in our musical alphabet. If you look carefully you will notice that the sequence repeats. Musical notes trail off endlessly getting higher in pitch at one end, and getting lower at the other.
This is how the guitar can have two strings named E. The sixth string is a very low sounding E note, while the first string is a very high sounding E note. The concept of having notes with the same name at different pitches is referred to as different octaves.
This can make it difficult to be sure you’re tunning to the correct octave. Tuning your guitar string to the wrong octave could result in breaking a string, or at the very least, an unusual sounding guitar.
With the accumulation of more experience you will overcome this problem quite easily.
Generally, your new guitar will already be close to the right note so problems using an electric tuner can be avoided easily. The problem can also be solved by comparing the sound of your guitar string to another instrument such as a piano. In Figure 1o each note has been explained with illustrations and manuscript. Beginners struggling with the task should get their teacher to help them.
Using an Electric Tuner
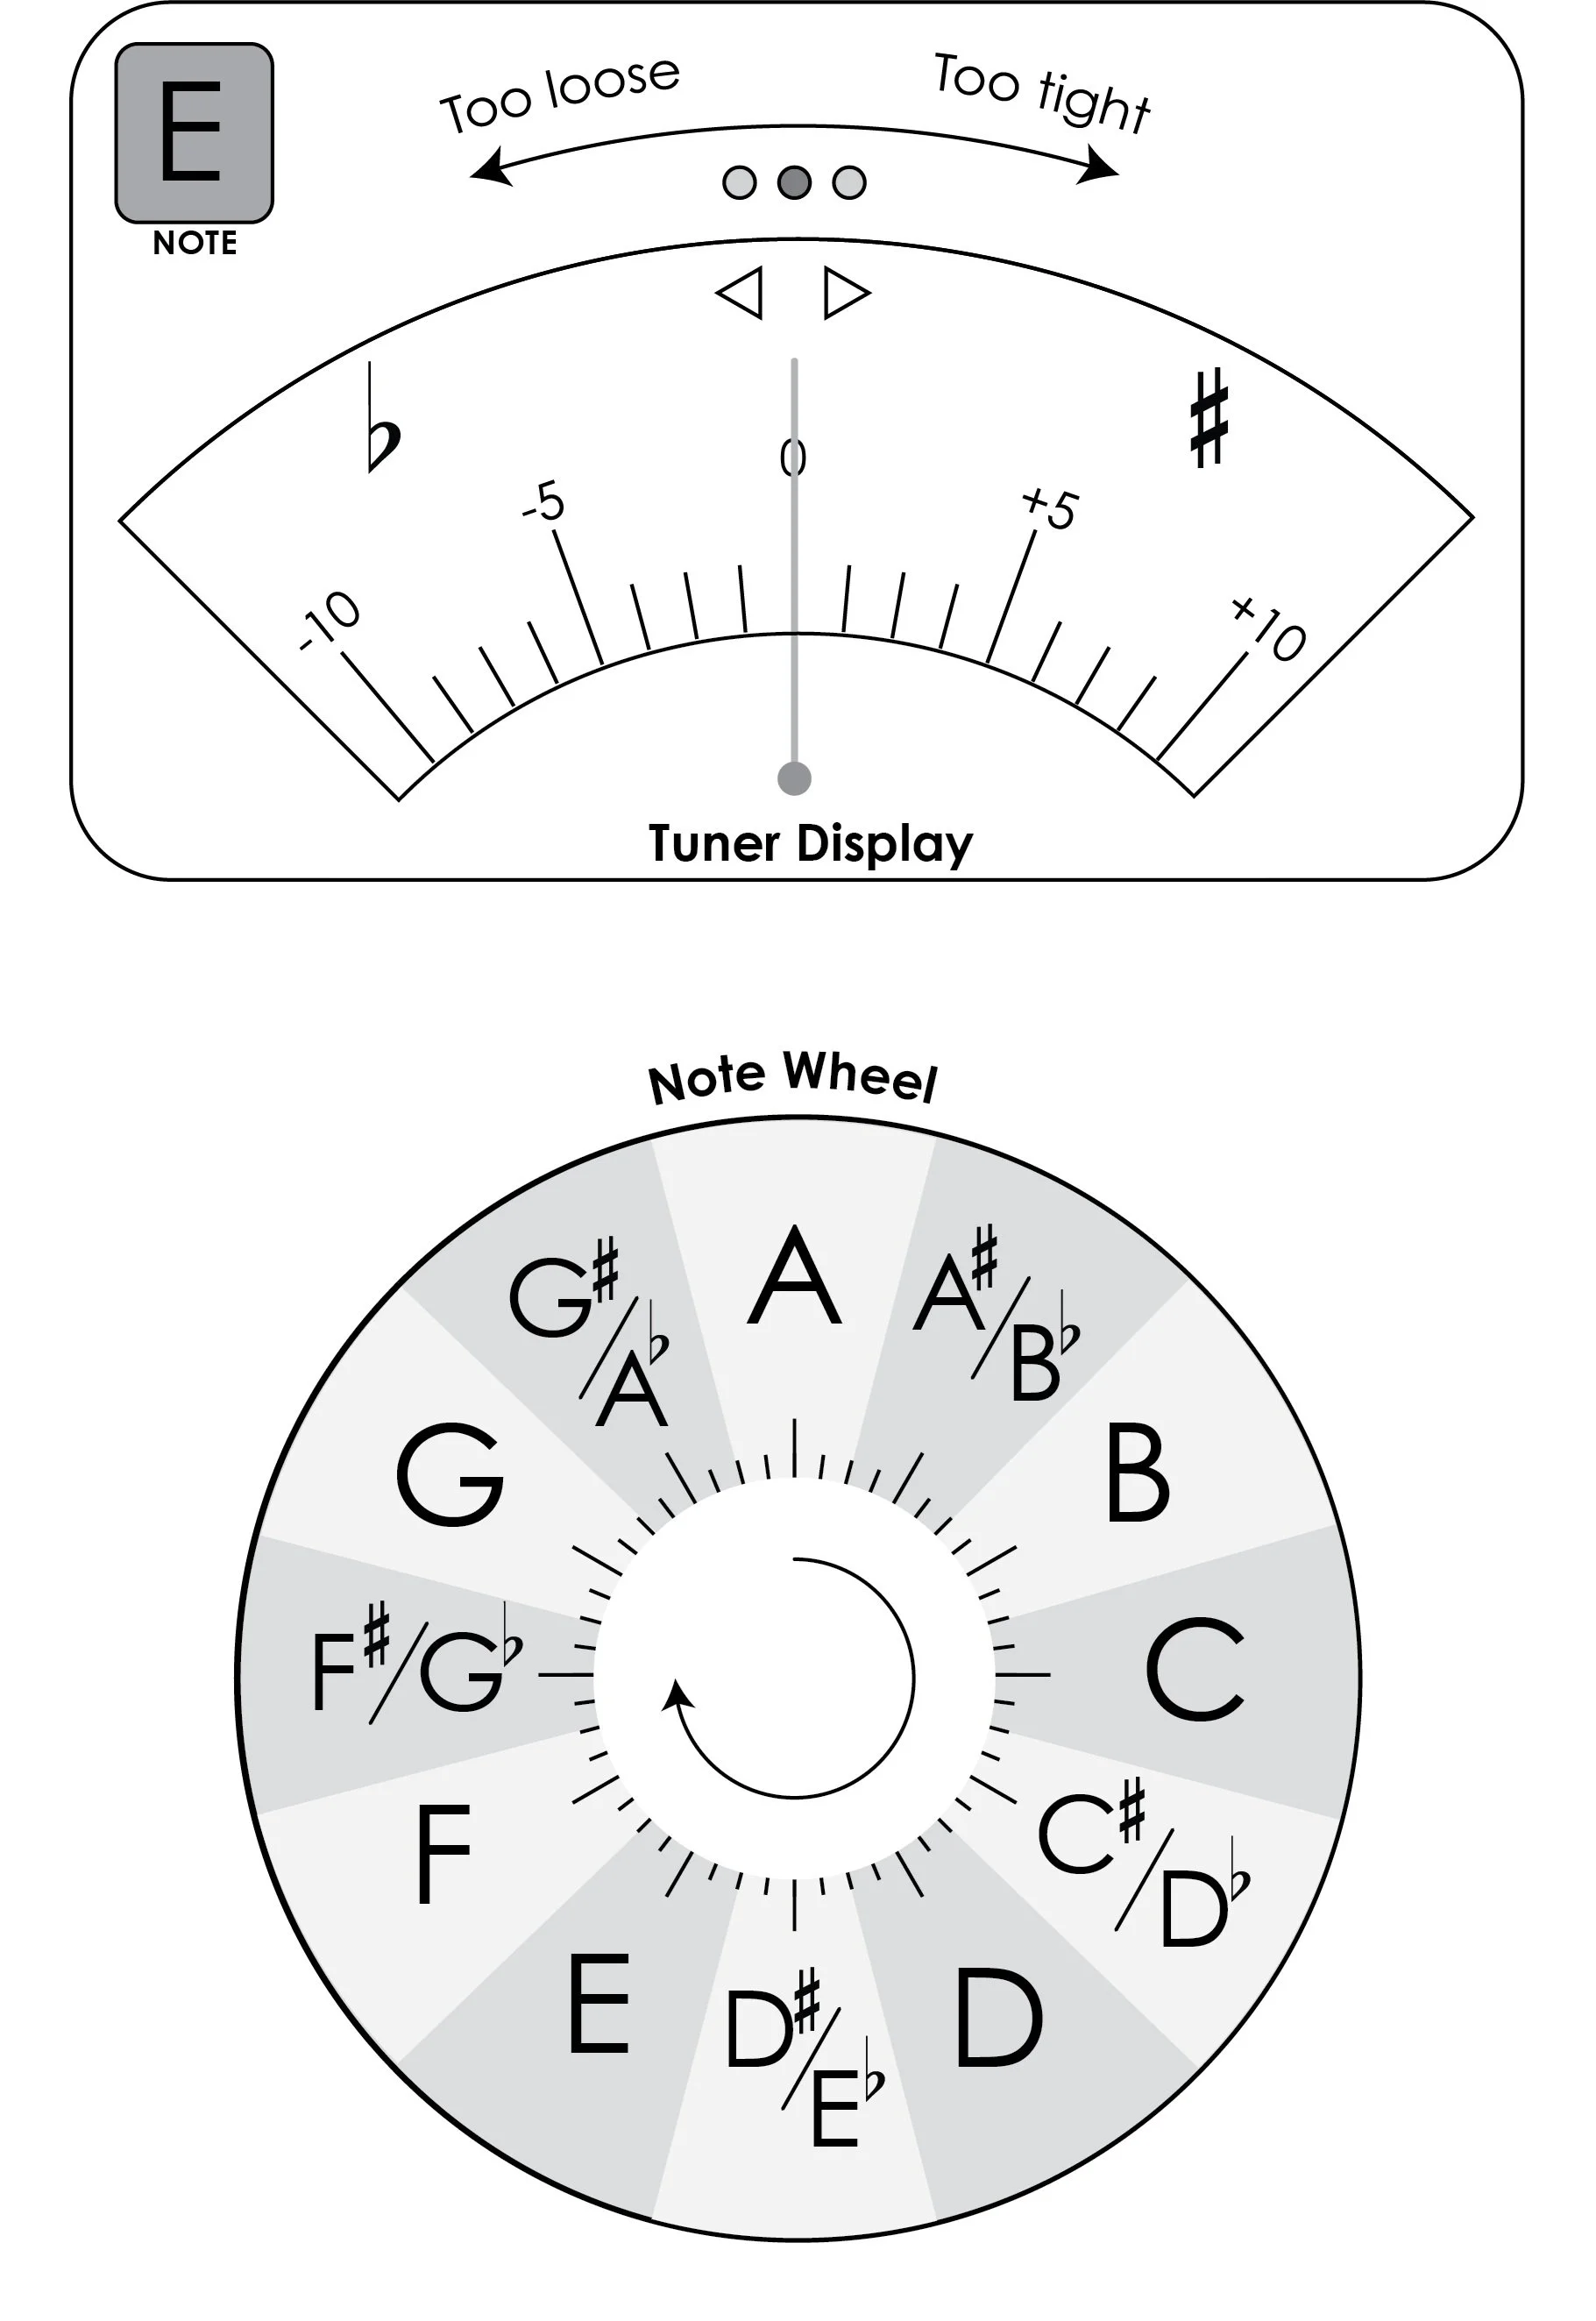
Each electric tuner will work on the same principal. Once you play a single string, the tuner will attempt to detect the note (which will be displayed somewhere on the screen) and then use a needle or lights to indicate how close the string is to being in tune. You can see an example of this in Figure (t). When the needle sits in the middle (0), the string is in tune. If the needle is positioned left of the middle, then the string is ‘too loose’, and must be tightened. If the needle is positioned right of the middle, then the string is ‘too tight’, and must be loosened.
To tune the string you will need to modify its tension. This is done by turning the matching tuning peg. To be sure you’re turning the right peg, follow the string all the way to the headstock, and see where it is attached. At first you won’t know which way to turn the peg. The best way to find out is to experiment. Pluck the string so you can hear it, then slowly turn the tuning peg. Keep an eye on the tuner to see the result. Turn the tuning peg in the direction that brings the string closer to the middle.
To get the best result from your tuner, try to strike the string very clearly, without any rattles, and always strike one string at a time.
Occasionally, your guitar may slip quite far out of tune, especially if the strings are new. In this situation you may notice that, when you strike the string, the tuner indicates you are playing a note other than the one you wanted. For example, you may have set out to tune your ‘E’ string, but the tuner indicates you are playing an E flat (written as Eb). This is where the ‘note wheel’ section of Figure (t), comes into play.
This note wheel displays all of the notes in sequential order. As you move clockwise around the wheel, notes ascend in pitch and then descend in pitch as you move anti-clockwise.
So if our tuner is displaying an Eb, but the note we require is an E, we need to move one position clockwise to get from Eb to E, this means we will need to tighten the string by turning the peg.
As you tighten the string the needle will move very far to the right, indicating an over-tensioned Eb. As you progress you may notice the needle swing back to the far left. This occurs just as the string transitions from an Eb to an E, and is perfectly normal.
On occasions, if you are in-between notes, the needle will skip back and forth from side to side. To solve this, simply keep turning and the string will settle on one note.
Once the tuner indicates you are on the E note, continue to adjust the string until the needle rests in the middle.
Always adjust strings at a steady pace, striking regularly so you can monitor your progress.
Tunning Tip
Pluck the string and turn the tunning peg at the same time
Make small adjustments
Watch the tunner to see how your actions affect the string